Broomfield, Colorado
Jay @ (720) 595-4047 or jayjrandolph@gmail.com
Jay @ (720) 595-4047 or jayjrandolph@gmail.com

The pattern for the oven was based on a Forno Bravo design which I bought. I laid it on melamine. I followed the plans exactly. the good thing about using the insulation is it is somewhat forgiving and if you take your time can be trimmed easily. I used a sawzall to trim it. I also used a sander (yes, an electric sander) to smooth out the final mold. It's very smooth.
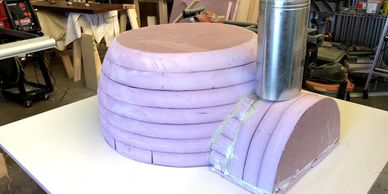
Using 2" rigid foam insulation I "carved" the form for the pizza oven cavity. The floor area is 32". Because this is for home use I didn't want to make a huge oven - 32" should accomadate 1-2 - 10inch pizzas.
I used something like 5-6 sheets of the insulation. I made a simple circle maker to make the circles and the round arch.
I made the arch too small (notice the flat pieces under it) and this broke apart when I removed the mold from the cast. Make it all one continuous piece next time.
I had thought I would "pour" the cement, so I built a negative mold with spray foam - bad idea. I ended up just casting on the mold on the melamine board. Worked great.
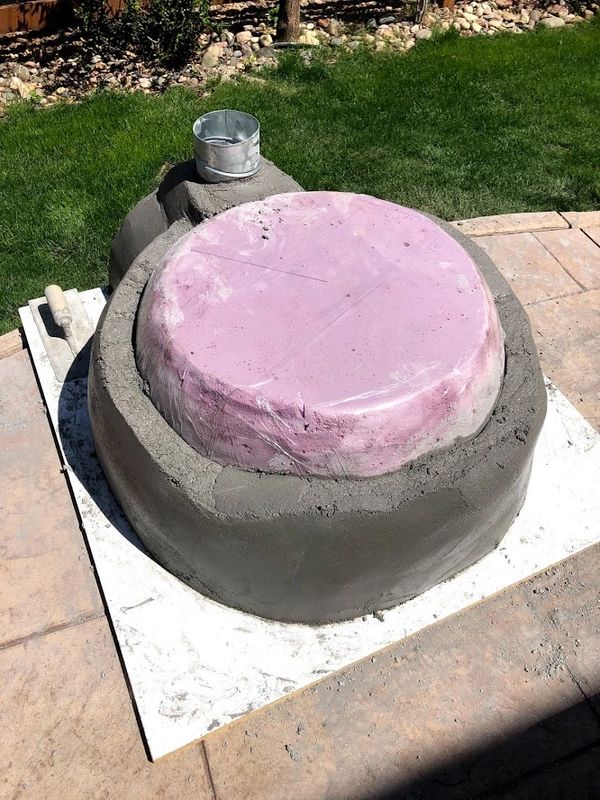
Be sure your cement isn't too wet when casting on the mold - too much slump slides down. You can see that a little bit on a front shot of the cast - notice how the bottom is thicker than the top, you want to avoid that as much as possible.
If you start and the cement is too wet, throw it back into the bucket and mix in a little dry cement - not an approved method but it will work.

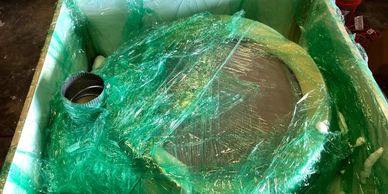
The mold did not release from the cast as I'd liked. I wrapped the mold in food wrap film. I think if I used plastic sheeting (3 mil+) it would have released easier. I also should have caulked around the bottom edge of the mold so cement wouldn't creep under the mold and in the process made it harder to release the mold.
Good news is the mold is mostly intact and I have a better plan for next time.

As I have said un-molding the cast was tricky/hard. Getting it off the melamine board was straight forward. I had put long screws in the mold to hold it in place - bad idea, use short screws as they come out easier.
The cast weights a couple hundred pounds so lifting it up off the melamine required muscles and lucky I have a strong family!
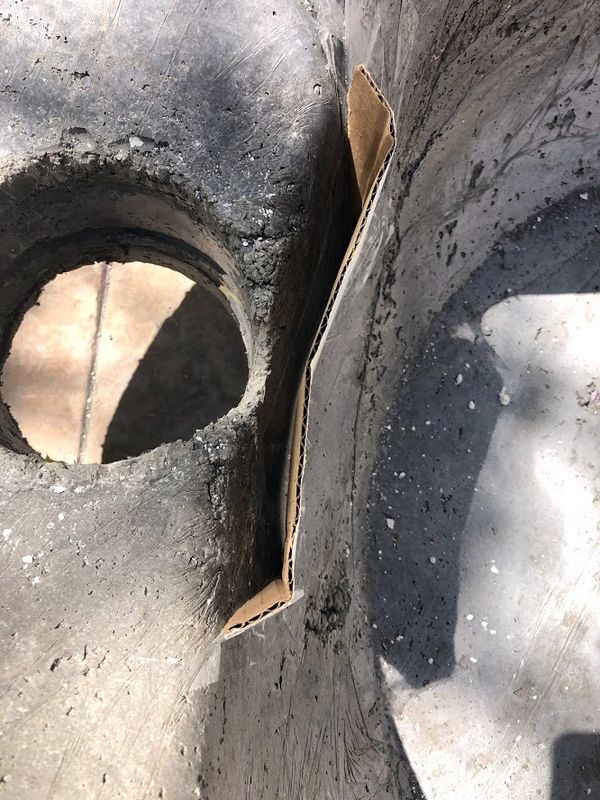
I left it on it's back because I didn't like the thin edge on the oven side of the chimney. I made a cardboard form and built it up. I'll post the repair before and after.
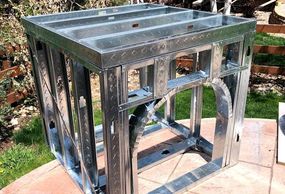
I've built a few outdoor kitchens using steel framing so I thought I would use it for the base of the oven. The studs are 12" OC vs 16" and the top studs are 10" OC. I reinforced the front portion over the arch to help support the weight and the oven landing which will stick out approx. 8". I will have a couple of supports for the oven landing. This will make the front visually interesting too. It's also why the two studs above the arch are faced flat - the supports will be anchored to these.
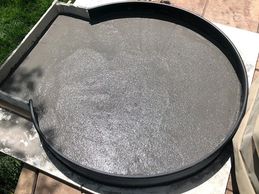
The oven floor will be made from refractory cement poured into this mold. The thickness will end up being just a couple of inches (one bag) but I think it will work just fine.
I will be pouring a "slab" of vermiculite concrete on the base, then setting the floor and oven on the slab.
Here is a small time lapse of the casting process. If you notice at one point I scrape away the cement and re-mix it. The cement was too wet and was slumping.
The oven floor is 32" and I used roughly 7 bags of refractory cement
Here is a video of un-molding the form from the cast.
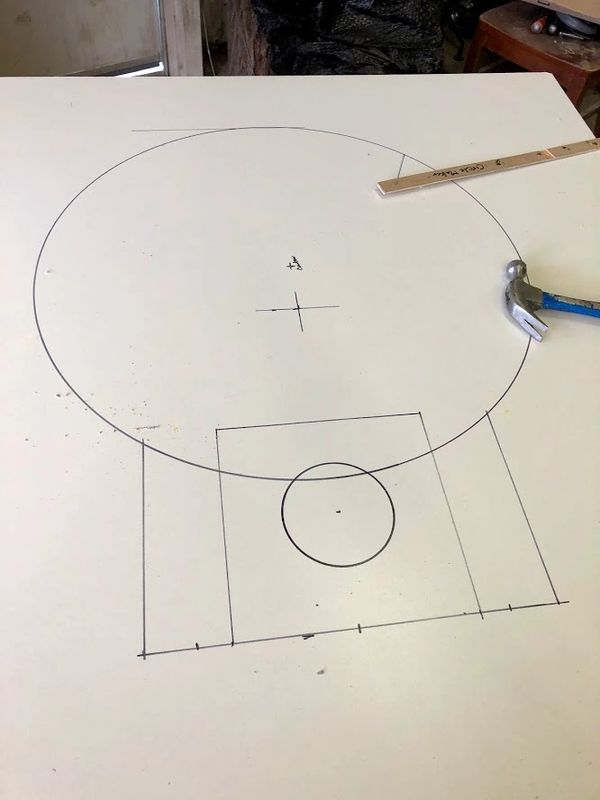
Tracing the outline on melamine to build the form on

The form was built with 2" rigid foam insulation
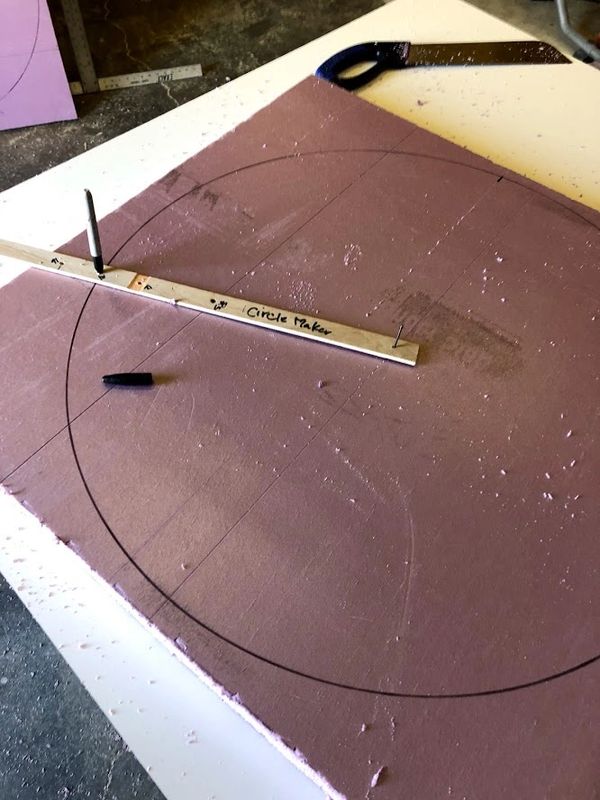
I made a simple circle maker to make the floor outline and the arch shape. I traced the circles directly on the insulation and cut them out with a jigsaw
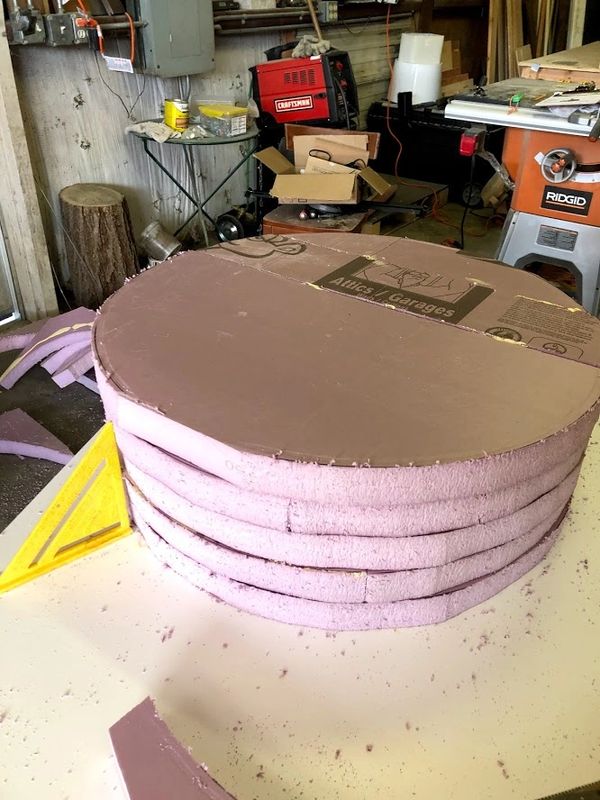
Layering up the mold form. I kept all the circles the same size all the way up. I then shaped to what I was looking for.
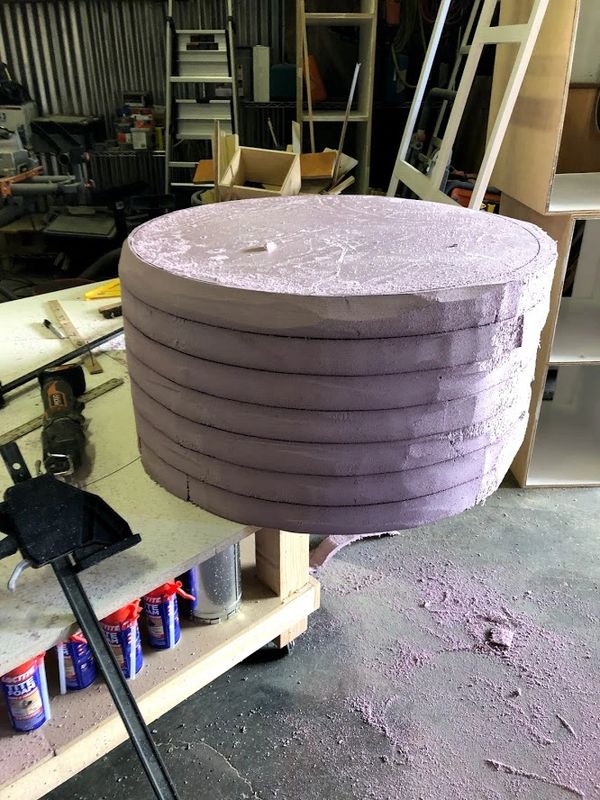
The height I wanted, now start rounding the shape
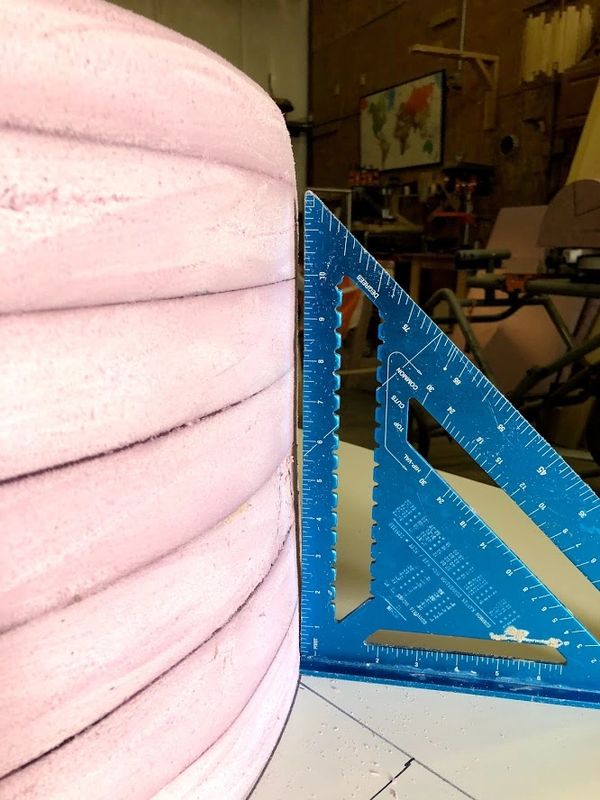
Using a square helped line up the circles and gave me a sense of the shape as it emerged
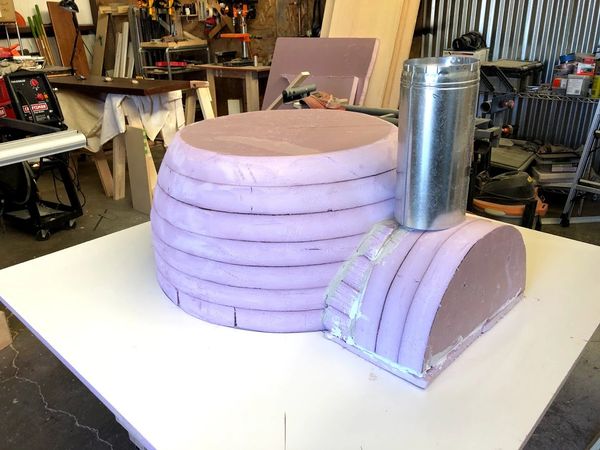
The final mold. Notice the front arch has a flat piece under it. I didn't make it tall enough. This flat piece was a problem during the un-molding

Waste is always a disappointment. I tried to use some of this scrap but that ended up being a problem during the un-molding. The intent was to make a re-usable mold - the small pieces broke apart.
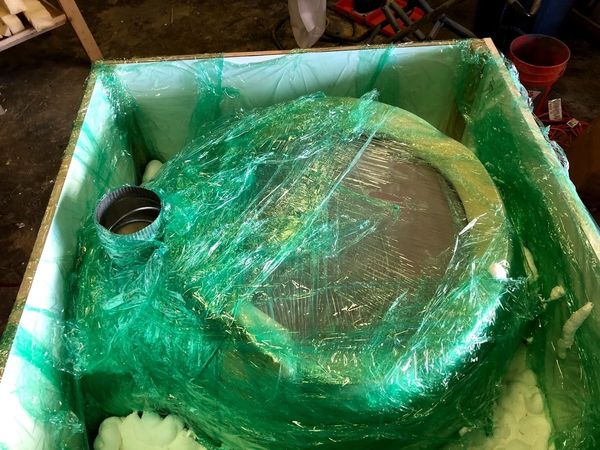
Fail - I was going to pour the cast so I built a negative out of spray foam. A time consuming, kind of expensive track that I abandoned. I'm glad I did. It was a lot easier laying up the cement on the mold
This is a pic of the foam negative. Too many gaps/holes and not sturdy enough for me
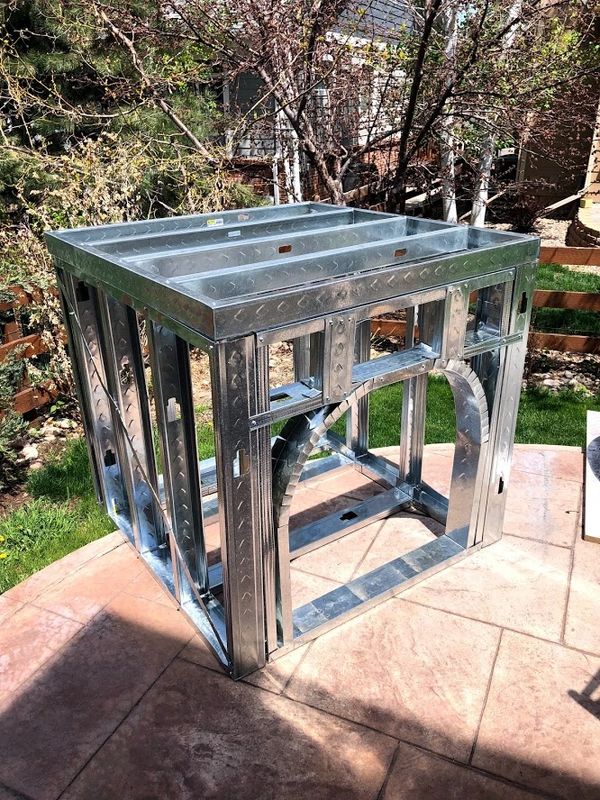
The base frame. I have built a number of outdoor kitchens with steel framing so I think it will work well in this application. The base studs at 12" OC (vs 16") and the top studs are 10" OC. I reinforced the arch

Wrapping the base in cement board. The finish is yet TBD
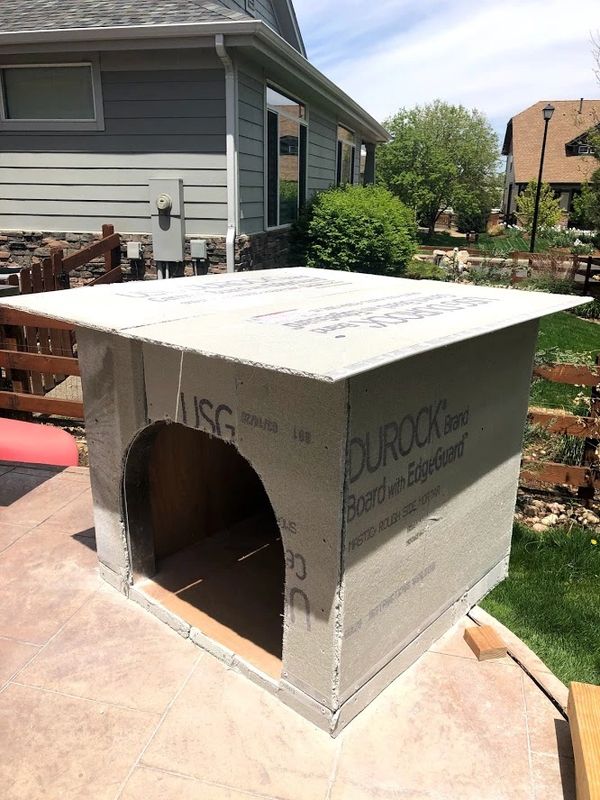
The final base. The overhang in front will accommodate the oven landing. This will be supported by brackets I am making.
This is the first cast - I ran out of refractory cement so I had to do a 2nd cast
The front view shows where some slumping occurred on the bottoms. Overall the walls are fairly even thickness
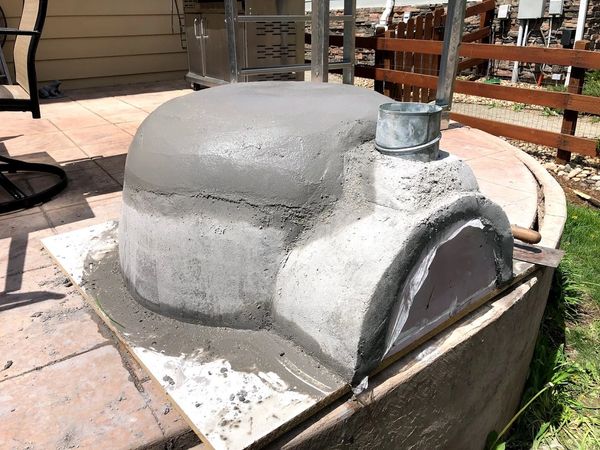
The final cast. Roughly 7 bags of refractory cement

The un-molding! The flue I used for the chimney had too many ridges so it was difficult to remove. I'd use a smooth tube next time.
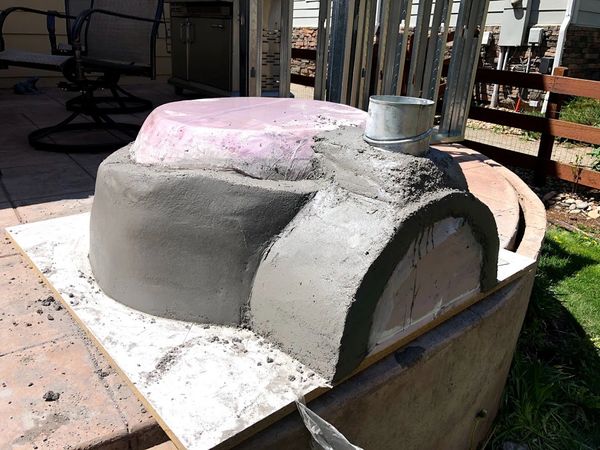
I didn't like the result on an area around the chimney so I did a little repair or build-up. I'll adjust this on the re-built mold
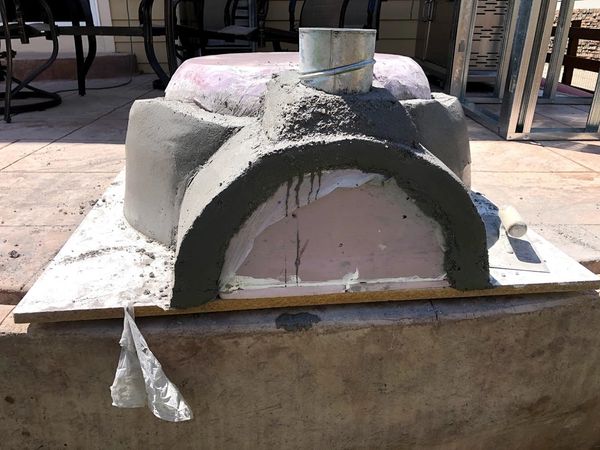
The chimney repair. I'm very happy with the result. I used a piece of cardboard for the form (previous pic)
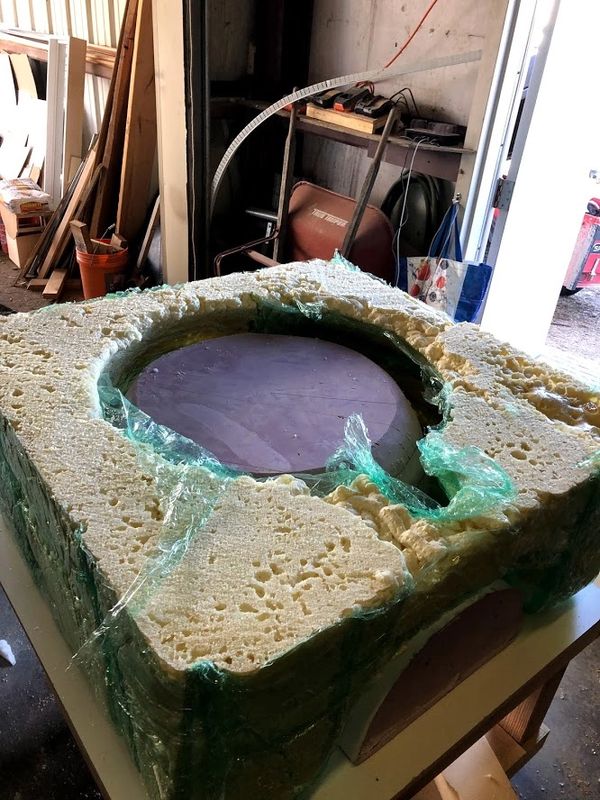
The foam mold is mostly intact after the un-molding. What I learned I'll apply to the next form
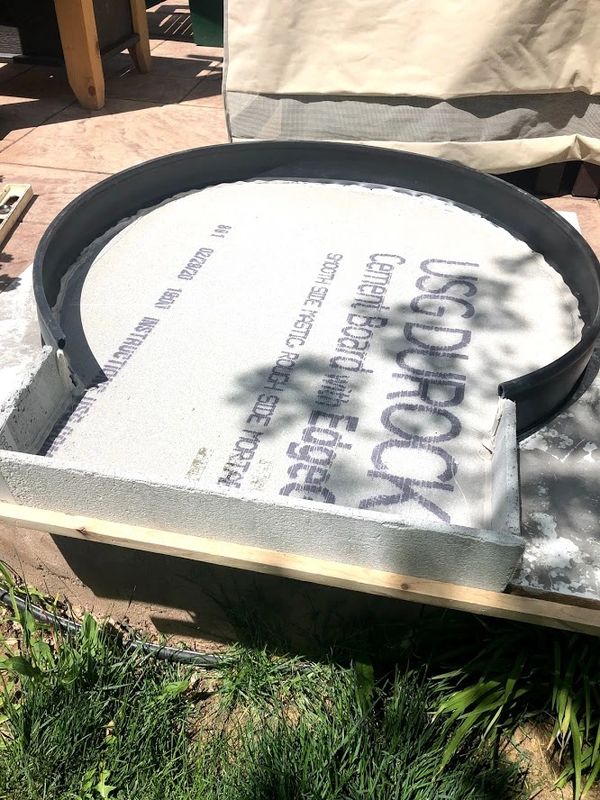
Pouring the floor, this is the form I used. I am not sure if the cement board is a good idea? I'll let you know....
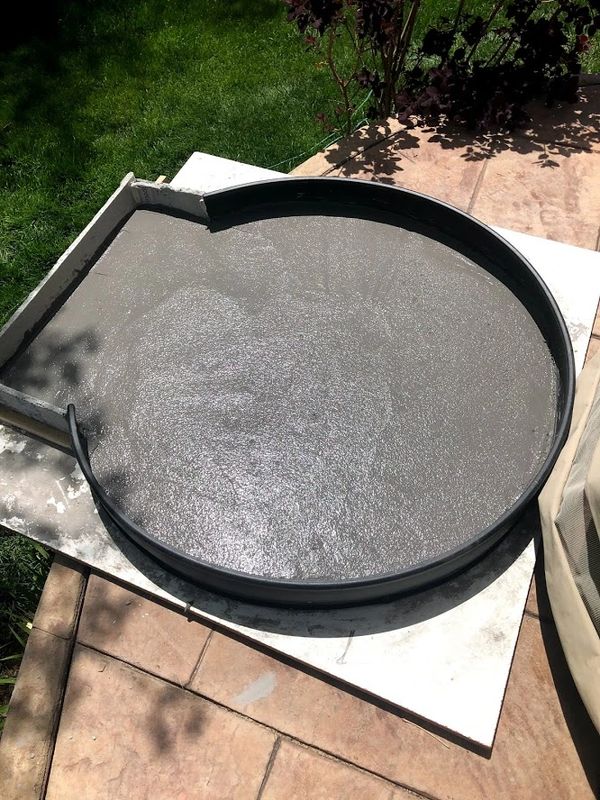
Poured the oven floor, a couple of inches of cement. Used one bag of refractory cement, wish I would have had one more.
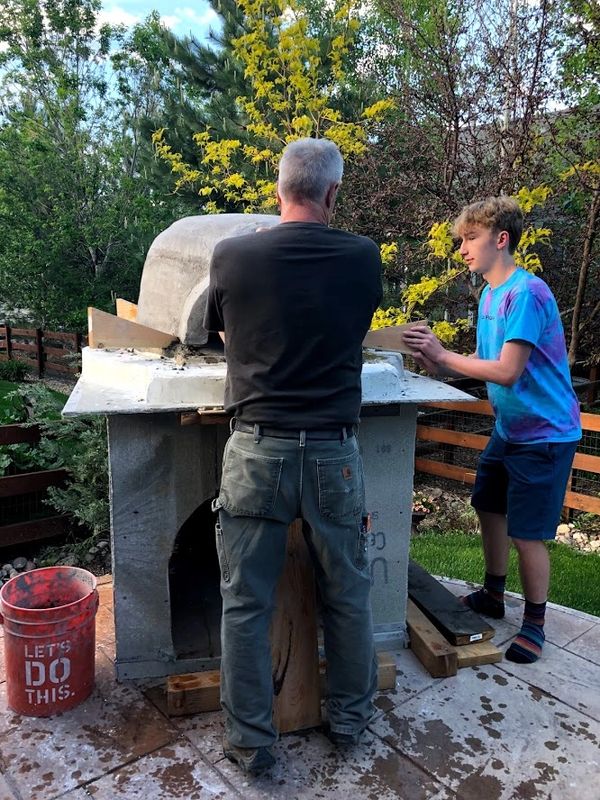
Setting the oven in place
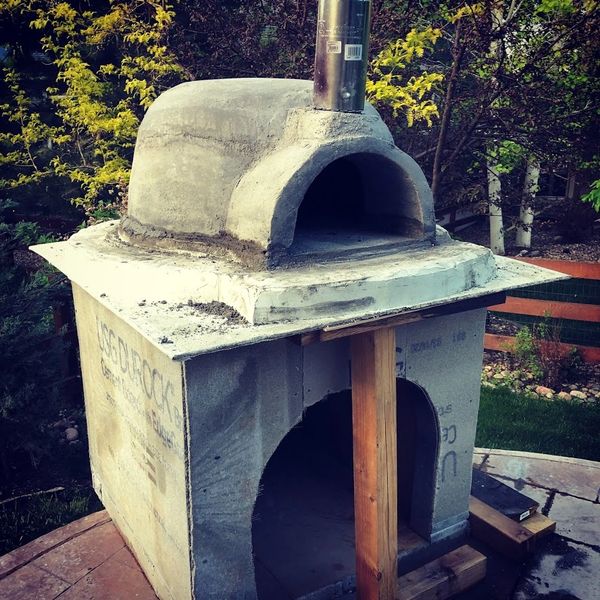
Oven set in place
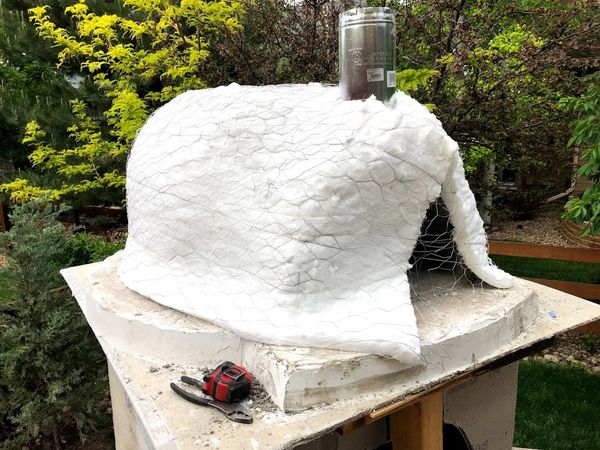
Adding the insulation and securing with chicken wire. The overlap is trimmed away after the first coat of stucco
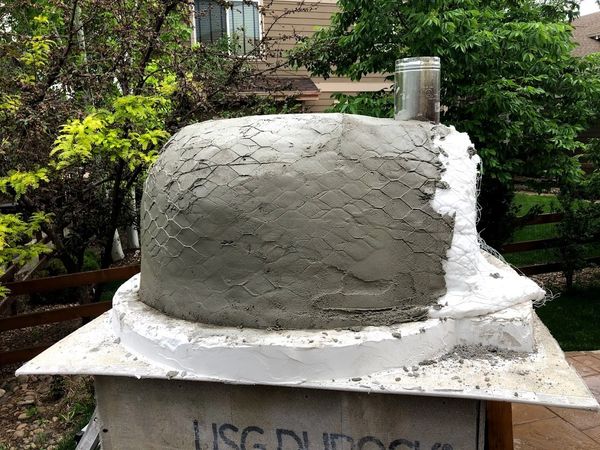
First coat of stucco over the chicken wire and insulation
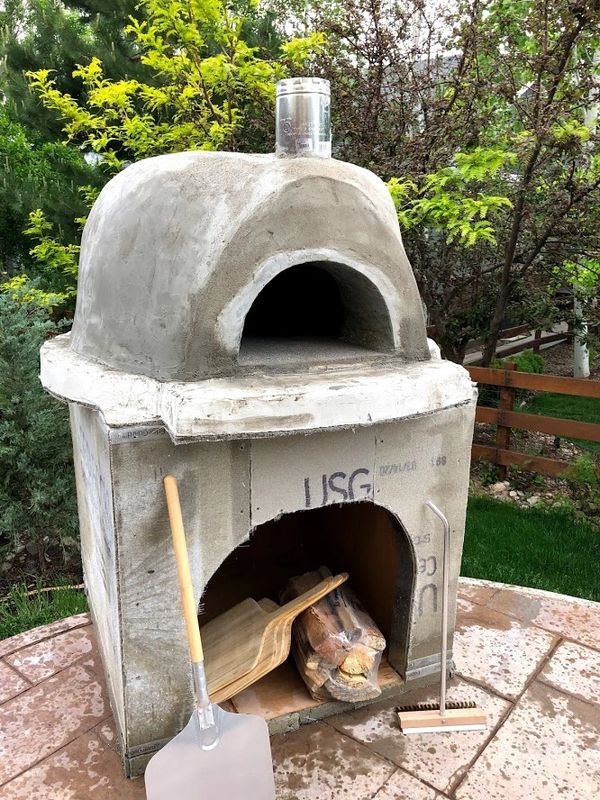
Second coat of stucco completed
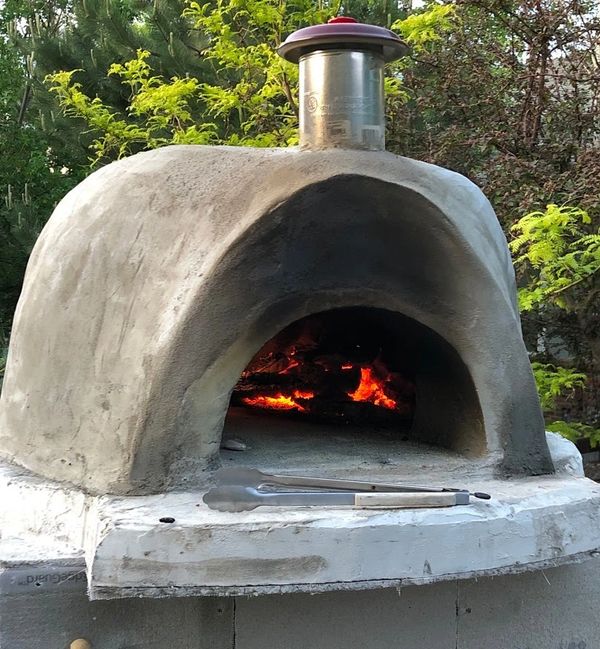
First fire!

One of the first pizzas!
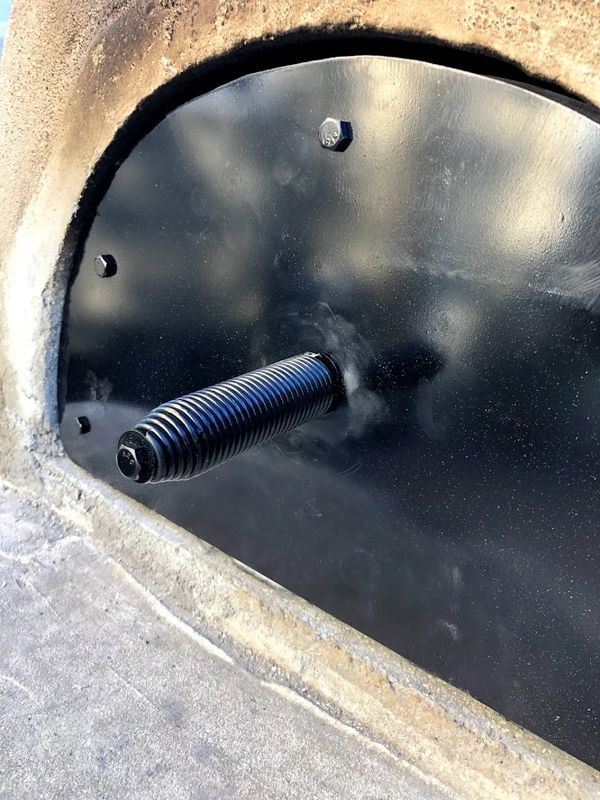
Oven Door - welder was down so I bolted it together. The spring handle is from a trampoline repair - reuse!
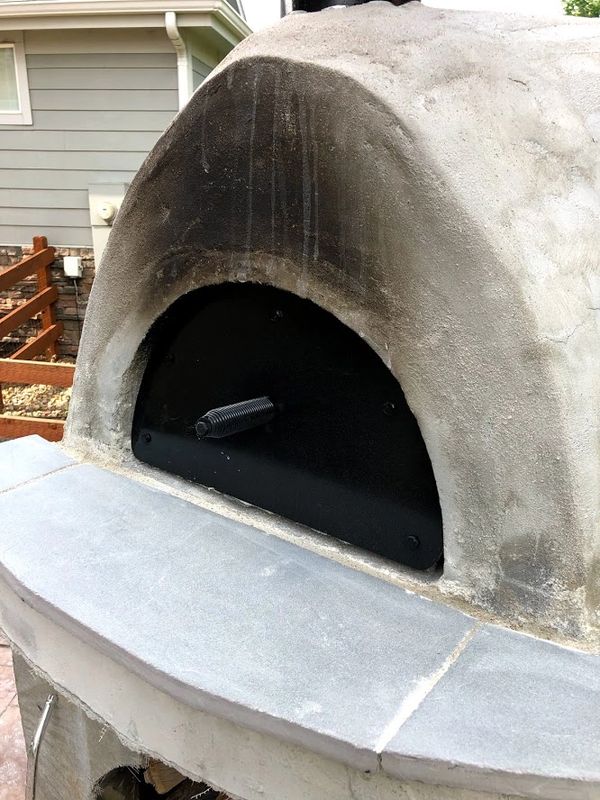
Oven Door
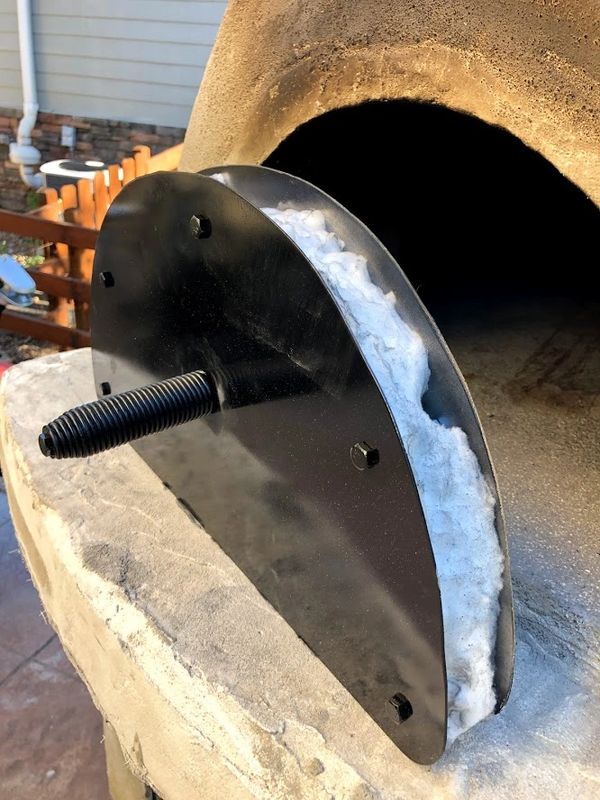
Oven Door - 2 metal plates bolted together, filled with ceramic insulation. Handle stays cool even when oven is fully heated